Narita Airport arrival goes smoothly for passengers who know what to expect and creates headaches for those who do not. Not because the airport is difficult. Narita International Airport is well-organised, well-signed in English, and staffed by people who are genuinely helpful. The friction comes from arriving without a Visit Japan Web QR code, or not knowing which terminal serves which airline, or joining the longest immigration queue when a shorter one is right there. Minor things that compound when you’ve been airborne for twelve hours.
Two airports serve the Tokyo area: Narita International Airport (NRT) in Chiba Prefecture, roughly 60 km east of central Tokyo, and Haneda Airport (HND), about 14 km south of the city. Haneda is closer. Narita is bigger and handles the majority of long-haul international flights. For most readers, arrival at Narita Airport is where their Japan experience begins.
A third gateway, Kansai International Airport (KIX), serves Osaka, Kyoto, and Nara directly and handles growing long-haul traffic from Europe, the Gulf, and Southeast Asia. If your itinerary starts in western Japan, Kansai is the relevant airport. This guide covers Narita in detail and summarises Haneda and Kansai for comparison.
Japan (NRT) Narita Airport Terminal Map
Narita has three passenger terminals. Knowing which one your flight uses before you land saves confusion at baggage claim and avoids missing connections because you’re in the wrong building.
Terminal 1
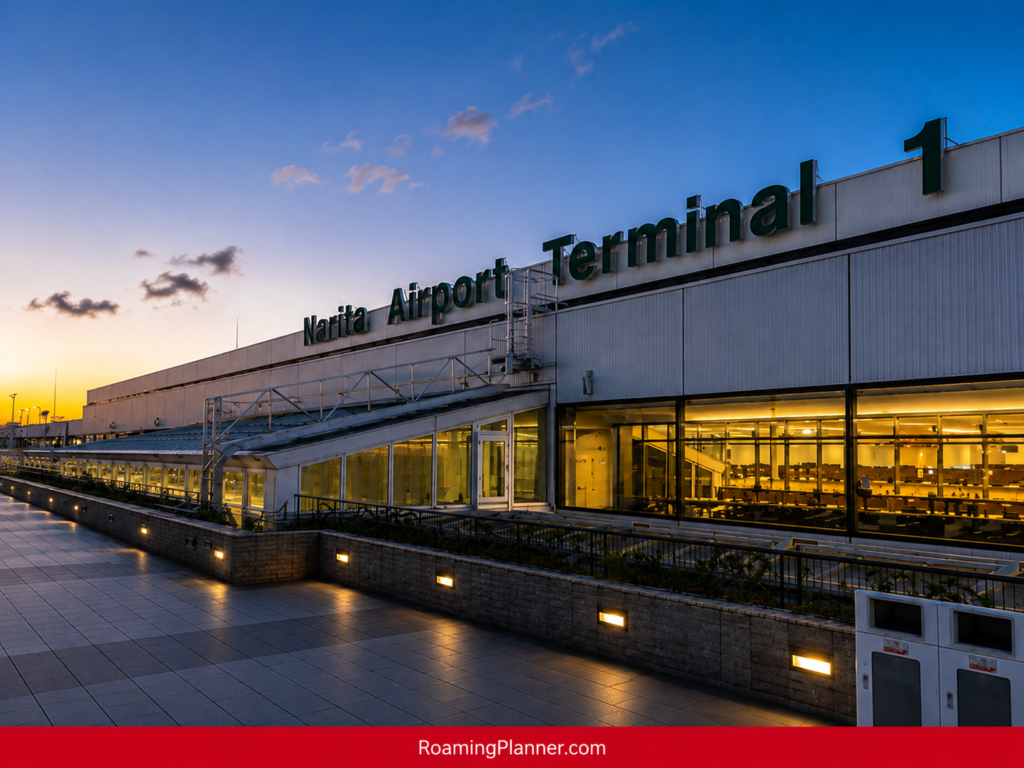
The largest terminal at Narita, divided into a North Wing and a South Wing connected by an underground passage. Terminal 1 handles most major international carriers including Lufthansa, British Airways, Air France, KLM, Swiss, Qatar Airways, Emirates, Singapore Airlines on some routes, and several Asian carriers. The JR Narita Express station and the Keisei Skyliner station for Terminal 1 sit below the building and are accessible from the arrivals level without going outside.
Terminal 2
Narita’s hub for Japan Airlines and its oneworld alliance partners, along with several other international carriers. Terminal 2 is connected to Terminal 3 by a covered walkway of approximately 600 metres known as the Running Track path, which is faster than waiting for the inter-terminal shuttle bus between those two buildings. The JR and Keisei train stations for Terminal 2 are located in the basement, as at Terminal 1.
Terminal 3
The low-cost carrier terminal, used primarily by Jetstar, Peach, Spring Airlines Japan, and other budget operators. Opened in 2015, it is smaller and more straightforward than Terminals 1 or 2. There is no direct rail connection from Terminal 3; passengers use the free shuttle bus or the Running Track path to reach the Terminal 2 train stations. Dining is concentrated in a food court rather than spread across multiple levels.
Free Inter-Terminal Transfers
Yellow shuttle buses run between all three terminals every 10 minutes. The journey between Terminals 1 and 2 takes around 10 minutes by bus. Between Terminals 2 and 3, the 600-metre Running Track walkway is often the faster option during off-peak hours.

The Arrival Process at Narita Airport
Step 1 — Visit Japan Web QR Code
Narita Airport arrival begins long before the plane lands. Every visitor should complete their Visit Japan Web registration at vjw-lp.digital.go.jp three to seven days before departure. The system generates a single unified QR code covering both immigration clearance and the customs declaration. Presenting this at the e-Gate kiosks moves the entire arrival process considerably faster than filling in paper forms at the counter.
If you land without a Visit Japan Web QR code, paper immigration and customs forms are still accepted. Collect one from the cabin crew on the plane or from the form racks at the immigration hall entrance.
Step 2 — Immigration
All foreign visitors join the immigration queue in the arrivals hall. The foreigner lane has both automated e-Gate kiosks and staffed manual counters.
At the automated e-Gate: scan your Visit Japan Web QR code, then scan your passport, look into the camera for facial recognition, and place your index fingers on the fingerprint reader. The gate opens and the process is complete in under two minutes per person. Automated lanes are available to most passport holders from visa-exempt countries.
At the staffed counter: the officer takes your fingerprints, photographs you, checks your documents (passport, return ticket, accommodation confirmation), and stamps your passport. First-time visitors to Japan are processed at the staffed counter for biometric enrolment even if the e-Gate lane is available; subsequent visits use the automated system.
Peak arrival windows at Narita cluster between 7am and 10am when overnight long-haul flights from Europe and North America land in sequence. Immigration queues during this window at Terminal 1 can run 40 to 60 minutes. The rest of the day moves considerably faster. If your arrival time is flexible, afternoon and evening flights often clear immigration in under 20 minutes.
Step 3 — Baggage Claim
Flight information screens at the entrance to the baggage claim hall list carousel numbers by flight. Narita’s belt system is reliable and bags typically begin appearing within 10 to 15 minutes of the first passenger reaching the carousel. Oversized items and golf bags go to a separate outsize collection point adjacent to the main belts; look for the signage before assuming your bag has been lost.
If a bag hasn’t appeared within 30 minutes of the first bag from your flight, go to your airline’s baggage services counter inside the arrivals hall before you clear customs. Filing a Property Irregularity Report from inside the terminal is significantly easier than trying to resolve it after you’ve exited.
Step 4 — Customs
Every person arriving in Japan must submit a customs declaration, either via the Visit Japan Web QR code at the e-Gate kiosks in the customs hall, or by completing the paper Accompanied Articles Declaration form on the plane. The green channel is for passengers with nothing to declare above the duty-free threshold. The red channel is for passengers carrying dutiable goods, cash above JPY 1,000,000, or any restricted or prohibited items.
Unlike many countries, Japan requires that even green channel passengers scan their QR code or submit their paper form at the customs kiosk. Walking through the green lane without submitting a declaration is not an option.
Key customs limits to know before you reach the hall: 3 bottles of spirits (760ml each), 200 foreign cigarettes plus 200 Japanese cigarettes, and personal goods with an overseas market value under JPY 200,000. Cash and monetary instruments above JPY 1,000,000 must be declared. Narcotics, stimulants, and certain prescription medications containing pseudoephedrine are prohibited regardless of how small the quantity is.
Full customs details: Japan Visa & Entry Requirements
Step 5 — Arrivals Hall
Narita Airport arrival concludes in the arrivals hall, which is immediately beyond the customs exit. Within 200 metres of walking through the automatic doors, you can collect a SIM card, withdraw Japanese yen, exchange currency, buy a Welcome Suica or Tourist Pasmo card, pick up a JR Pass (if you ordered before arriving), book ground transport, and meet a pre-arranged transfer driver.
SIM cards and Wi-Fi: Counters for IIJmio, NTT Docomo, and au are located in the arrivals hall of both Terminal 1 and Terminal 2. SIM vending machines operate 24 hours near the exits. A tourist data SIM with 30 days and unlimited data starts at around JPY 3,000 to 4,000.
ATMs: 7-Bank ATMs (Seven Bank, operated by 7-Eleven) are the most reliable machines for international cards in Japan. They accept Visa, Mastercard, Maestro, Cirrus, American Express, and most other international networks. The machines display English menus and have no foreign card surcharge beyond whatever your home bank charges. Withdraw JPY 30,000 to 50,000 on arrival to cover the first few days before you locate a bank branch ATM in the city.
JR East Travel Service Center: Located in the arrivals hall of Terminals 1 and 2. This is where you activate pre-purchased JR Passes, buy Welcome Suica IC cards loaded with transit credit, and purchase Narita Express (N’EX) tickets to Tokyo. Queue here before heading to ground transport if you need any of these.
Welcome Suica and Tourist Pasmo: Both IC cards launched or updated in 2026 and are available at the JR East Travel Service Center and at the Keisei ticket windows in the basement. Load them here rather than discovering you need one when you’re at a metro gate in central Tokyo.
Meeting point: Pre-booked transfer drivers and hotel representatives wait in the designated meeting zone to the right of the arrivals exit, beyond the automatic doors. If you’ve arranged an airport transfer, go here before looking at the transport options outside.
Getting from Narita Airport to Tokyo and Beyond
The distance between Narita and central Tokyo is 60 km. Without knowing the transport options in advance, visitors discover this the hard way when a taxi driver quotes JPY 20,000 for the ride. The train and bus options cover the same distance in comparable time for a fraction of the cost.
| Transport | Destination | Journey Time | Fare |
|---|---|---|---|
| Narita Express (N’EX) | Shinjuku | 85 minutes | JPY 3,070 |
| Narita Express (N’EX) | Shibuya or Ikebukuro | 90 minutes | JPY 3,070 |
| Narita Express (N’EX) | Yokohama | 90 minutes | JPY 4,370 |
| Keisei Skyliner | Ueno | 41 minutes | JPY 2,570 |
| Keisei Limited Express | Ueno | 70 to 80 minutes | JPY 1,030 |
| Airport Limousine Bus | Shinjuku | 75 to 90 minutes | JPY 3,200 |
| Airport Limousine Bus | Haneda Airport | 75 to 90 minutes | JPY 3,200 |
| Taxi | Central Tokyo | 60 to 90 minutes | JPY 17,000 to 22,000 |
Narita Express (N’EX)
The Narita Express is a JR East service running direct from the basement of Terminals 1 and 2 to Shinjuku, Shibuya, Ikebukuro, and Yokohama. Trains run roughly every 30 minutes. Reserved seating. Large luggage racks at the end of each carriage. The JR Pass covers the N’EX for pass holders, which makes it effectively free if you’re activating a pass on arrival. Buy N’EX tickets at the JR East Travel Service Center or from the automatic ticket machines in the basement.
Keisei Skyliner
The fastest way from Narita to Ueno and the most cost-effective if your hotel is in the Ueno, Asakusa, or east Tokyo area. The Skyliner runs at 160 km/h and covers the distance in 41 minutes with two stops. It does not connect to the JR Pass but accepts Welcome Suica and Tourist Pasmo for the journey. Tickets are bought from Keisei windows in the basement or from online reservation at keiseibus.com.
Keisei Limited Express
Not the Skyliner, but the same Keisei line at a much lower fare. It stops at more stations and takes 70 to 80 minutes to Ueno. For budget travellers with no particular rush and a hotel in the east of the city, this is one of the cheapest ways from the airport at JPY 1,030.
Airport Limousine Bus
Direct door-to-hotel service to major hotels across Tokyo, Yokohama, and Haneda Airport. No transfers. Large luggage storage underneath. The downside is highway traffic, which can push journey times past 90 minutes during rush hours. Check departure times at the Limousine Bus counter in the arrivals hall. Seats are bookable in advance at the counter; turn up on a busy day without a reservation and some services may be full.
Taxi
JPY 17,000 to 22,000 to central Tokyo. Metered fare, legitimate, no negotiation required. The figure is what it is. For a group of four splitting the cost, it becomes more competitive with the train. For a solo traveller or a couple, there is rarely a case where the taxi beats the Narita Express on value.
Haneda Airport (HND) — The Closer Alternative
Haneda sits 14 km from central Tokyo and handles an increasing share of international routes in 2026. Several European carriers including Finnair, Air France, and British Airways now serve both airports. If you have a choice, Haneda offers shorter immigration queues, faster access to the city, and three international terminal buildings with comprehensive arrival facilities.
From Haneda to central Tokyo: the Tokyo Monorail reaches Hamamatsucho station in 13 minutes for JPY 500. The Keikyu Airport Line connects to Shinagawa in 11 minutes for JPY 370. Both feed into the metro network without requiring a taxi.
The arrivals hall layout at Haneda’s International Terminal mirrors Narita’s in terms of services: SIM card counters, 7-Bank ATMs, Welcome Suica machines, currency exchange desks, and ground transport booking counters. The principal difference is the 14-km distance to the city, which makes every transport option faster and cheaper than its Narita equivalent.
Kansai International Airport (KIX) — The Osaka and Kyoto Gateway
Kansai International Airport is built on an artificial island in Osaka Bay. It handles international flights from Europe, the Gulf, Southeast Asia, and North America serving travellers whose itineraries begin in Osaka, Kyoto, Nara, or Hiroshima. If Japan’s western regions are your first destination, flying into Kansai rather than Narita saves the transit to Tokyo and the subsequent Shinkansen journey west.
From KIX arrivals: the Haruka limited express covers Shin-Osaka in 46 minutes and Kyoto in 75 minutes. The JR Pass covers the Haruka at no additional cost for pass holders. Osaka’s Namba district is reachable via the Nankai Rapi:t express in 34 minutes for JPY 1,430.
The arrival process at Kansai follows the same sequence as Narita: Visit Japan Web QR code or paper form, immigration, baggage claim, customs, arrivals hall. The same duty-free limits and customs regulations apply regardless of which airport you enter through.

What to Do in the First 30 Minutes After Landing
This is the additional heading this guide adds because the first 30 minutes at Narita set the tone for everything that follows. Most travel guides describe the arrival process in sequence without acknowledging that the sequence can be compressed significantly with the right priorities.
Minute 1 to 3: Off the plane, check that your Visit Japan Web QR code is visible on your phone before you reach immigration. The airport Wi-Fi works in the arrivals corridor, but loading a slow email while a queue forms behind you is avoidable.
Minutes 3 to 30: Move through immigration. If using the automated e-Gate, the process takes under two minutes. Staffed counters take longer; be patient and have your return ticket and accommodation address accessible, not buried in an email chain.
At baggage claim: Note your carousel number from the screens at the hall entrance before walking to any belt.
At customs: Scan your Visit Japan Web QR code or hand over your paper form. Green lane if you have nothing to declare above the duty-free limits.
In the arrivals hall, in this order: First, the 7-Bank ATM for cash (JPY 30,000 minimum for the first few days). Second, the JR East Travel Service Center if you need to activate a JR Pass, buy Welcome Suica, or purchase N’EX tickets. Third, a SIM card if you don’t have a Japan eSIM already installed. Then ground transport.
Most passengers who know this sequence clear the arrivals hall and board a train to Tokyo within 45 minutes of landing. Passengers who discover it on arrival can spend two to three hours sorting the same steps.
Useful Contacts and Links
| Resource | Link or Detail |
|---|---|
| Narita Airport Official Site | narita-airport.jp/en |
| Haneda Airport Official Site | haneda-airport.jp/inter/en |
| Kansai International Airport | kansai-airport.or.jp/en |
| Visit Japan Web | vjw-lp.digital.go.jp |
| Narita Express (N’EX) booking | jreast.co.jp |
| Keisei Skyliner booking | keisei.co.jp |
| Airport Limousine Bus | limousinebus.co.jp/en |
| 7-Bank ATM locator | 7bank.co.jp/en |

Final Tips Before You Land at Narita
Complete Visit Japan Web before you board your outbound flight, not on the plane. The system requires a functioning internet connection; the in-flight Wi-Fi on most long-haul routes is unreliable for form submissions involving QR code generation. Three to seven days before departure is the recommended window.
Charge your phone before landing. The Visit Japan Web QR code, your hotel confirmation, your return ticket, and potentially your Grab or transport app all live on your phone. Arriving at immigration with a battery at 8% is the kind of situation that costs you 20 minutes and a stressed conversation with a ground handler.
Download Google Maps with an offline Japan pack before you fly. Between landing, arriving at the train station in central Tokyo, and finding your hotel on foot, you’ll use it repeatedly in areas where data connectivity is intermittent. The offline pack covers navigation without burning through your SIM data.
The 7-Bank ATM in the arrivals hall accepts virtually every international card. Use it first. Japanese bank branches are excellent for larger withdrawals but are closed in the evenings and on weekends. The arrival hall ATM solves the immediate cash problem regardless of what time you land or what day of the week it is.
Narita Airport arrival at its best is an organised, efficient process that moves thousands of passengers through in manageable waves. Prepare the documents, withdraw cash immediately, activate your IC card before leaving the building, and board the right train. Japan is 45 minutes away.